Sunday, January 21, 2007

mending plate

I had an hour to kill at a hardware store a few days ago, so I walked up and down the aisles trying to think of how to put various tools and objects to use carving ice. I picked up a Strong-Tie MP36 Mending Plate and thought it might make a decent, one-handed nailboard. (As my friend, Dave, would say, "This nailboard was mislabeled as a mending plate.")

I tried it today, and it works great! I guess I shouldn't have spent all that time making my wooden nailboard. Attaching a whole bunch of these mending plates to a board would be a very quick way to make a large nailboard.

hot wire gear cutting

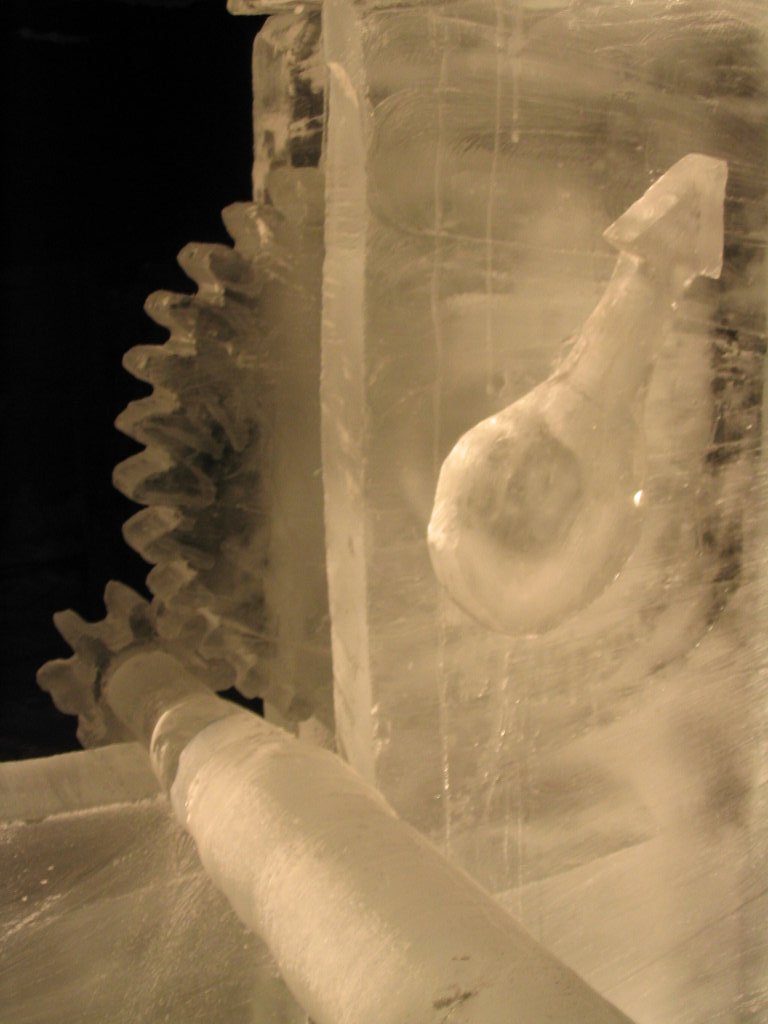
Today I tested a new hot wire gear cutter made of balsa, copper, and 21 AWG nichrome wire. I cut an eight inch cylinder of ice with the table-mounted chainsaw and placed the cutter on top of the cylinder. I still need to make an axle-mounted guide to keep the cutter steadily moving vertically without tilting or rotating, but I decided to do the first test without a guide.

As current was applied, the cutter started to slowly work its way through the ice. My power supply was only producing about 50W; it was enough to do the job, but I'd like to find a larger transformer that will cut faster and enable cutting of larger gears.

The finished gear had several flaws due to the lack of a guide but otherwise was beautiful. Making cutters like this one will take quite a bit of time, but the actual cutting time is very short. I think that this will be our gear cutting method for this year's event.

Thursday, January 18, 2007

chainsaw table mount

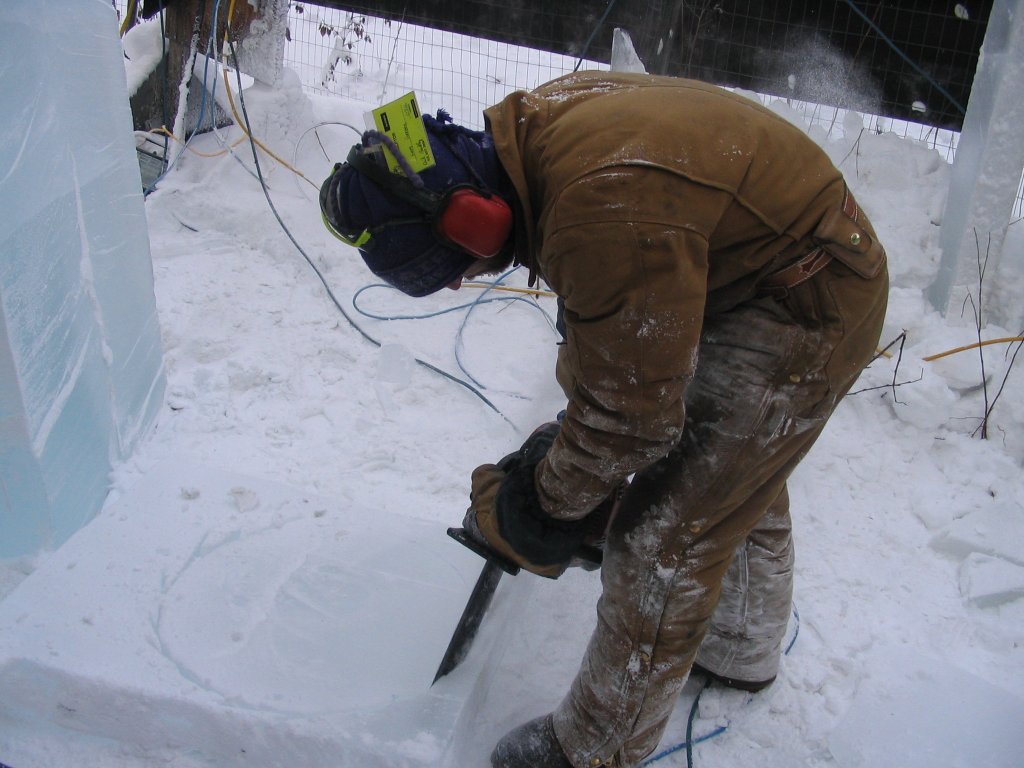
I tested a new table mount for my little, electric chainsaw tonight. It is made of steel flats and some nuts and bolts, and it allows the chainsaw to be used like a table saw but with more cutting depth.

My first use for it will be to precisely cut experimental ice chimes, but it may be handy during the competition as well. I also hope to use it to mill some boards from any trees I have to cut down this summer due to beetle kill.

The initial tests went very well. If Lars's 10", stationary, ice cutting, rotary bit doesn't make it redundant, I think we will find it quite useful.

It worked very well for cutting arcs and discs by inserting an axle perpendicular to the table-top and rotating the ice around the axle.

Monday, January 15, 2007

gear design tool

Steve Michel wrote to let me know about his amazing Excel spreadsheet for gear design. I probably won't need it this year, but I'll definitely keep it in mind for the future.

Saturday, January 06, 2007

nailboard

I found my new nailboard to be quite useful while making the snowflakes. I used it to even out the 1/2" plates of ice out of which each snowflake was carved.

I made the nailboard a few weeks ago but didn't try it out right away. It works like a mega-coarse grit sanding block.

snowflakes

I carved a small sculpture of three snowflakes to take to a New Year's Eve party. I tried to photograph them illuminated by a small reading light housed in a small cavity in the base of the sculpture, but only a couple of the photos turned out to be useful. I really need to use a tripod for this sort of thing.

The snowflakes were about 0.5" thick and were pretty fragile. I think I repaired thirteen separate breaks while making the things. Fortunately, two out of three snowflakes actually survived the journey to the party! I think the sculpture would have been easier to carve on a larger scale, but I was limited by available ice.

I took a photo with flash as well. It isn't as pretty, but at least it captured details despite my unsteady hands.

Friday, December 29, 2006

library books

I picked up Ice Carving Made Easy, Practical Ice Carving, and Ice Sculpting the Modern Way from the local library. I have finished the first two but am still working my way through the third. So far, I haven't encountered very many insights that I hadn't figured out already, but a few tidbits have stood out.

Ice Carving Made Easy contained a couple of interesting points. One was the description of steam cutting in chapter three. Both Lars and I have been experimenting recently with cutting ice by bringing it in contact with metal tubing carrying hot fluids. According to the book, using steam in this manner is "still preferred by some carvers accustomed to older techniques" despite its slowness.

Chapter One, The History of Ice Carving, of the book includes some interesting details of the ice palace commissioned by Empress Anna Ivanovna in 1739.

"Inside, every detail was carved from ice. The highlight was a translucent clock with all of its interior mechanisms detailed, displayed on an ice table in the middle of the drawing room."

Could it have been a working clock? Considering that the palace was built some years after the invention of the Deadbeat Escapement, I think that it is possible. A clock of the size Lars and I hope to build would have been difficult with the technology of the time, as would a very small clock, but a table-top model would have been the most likely to succeed. Lending credence to the idea is the account of various other functional artifacts of ice:

"Six statues and an elaborate frontispiece graced the front entrance; two dolphins and one life-sized elephant fountain sprayed water 24 feet into the air. Two mortars and six cannons fashioned of ice were working replicas; they fired frequently. An ice-log bathhouse, also functional and used on occasion, completed the grounds."

package for Lars

I sent a package to Lars containing a hot wire ice cutter for him to try out. It consists of a home-made variable power supply (encased in a CD spindle shell) and a 10 inch nichrome wire on a wooden bow. Since receiving it, he has used it for cutting foam but hasn't tried it on ice yet. I'm hoping he will try it in cold temperatures to see if it causes ice to crack.

The CD spindle (with center post removed) turned out to be a great case for the power supply. I used a cheap triac dimmer switch, a transformer salvaged from a useless wall-wart, and a little fuse holder from Radio Shack.

Monday, December 11, 2006

robotic fishing hole carving

I ran across Jesse Hemminger's art shanty projects and enjoyed the read. The CNC lake ice router is outstanding, but I was even more impressed by the simplicity of the hot water pipe technique. I'll have to give that a try.

Monday, December 04, 2006

big, scary lasers

I found this amazingly inexpensive, 25W, 808nm laser on ebay tonight. I was quite tempted to buy it as it appears to be a very complete unit, including power supply, cooling, power meter, and output fiber. Unfortunately, it appears that ice doesn't absorb much at the 808nm wavelength, so I guess I'll pass on this one. I finally found an outstanding data source for optical properties of water and ice. Based on this information, I'd say I need a wavelength of at least 980nm.

Sunday, December 03, 2006

laser cutting

Lars suggested using "high intensity lasers!" in one of his first emails when we started planning for Ice Art 2006. I laughed off the idea at first, but I'm taking it more seriously as time goes by.

Visible light lasers are certainly out of the question; they'd pass right through the ice without heating it. Infrared lasers, on the other hand, have a great deal of potential for ice cutting. Ice has a couple of peak absorption wavelengths at about 1500 and 2000 nm, but it looks like any laser in the infrared band would be worth trying.

I'm guessing that I need at least a 1W unit to do any meaningful experimentation, but the devices I've found so far are quite expensive. If anyone has lead on a cheap IR laser or laser diode (or salvage ideas), I'd appreciate it.

two turtle doves

This weekend brought good weather for ice carving practice, so I asked Emily what she would like me to make for her. "Two turtle doves," she replied. I have them sitting on a turtle shell, mounted on the deck railing by our front door. Apart from breaking off one of the beaks at the last minute, I thought the project went pretty well. I used a chainsaw and chisels on mediocre, home-made ice.

Sunday, November 26, 2006

more hot wires

The 15V power supply didn't work out, apparently due to some kind of current limiting circuit, so I cracked apart the 18V wall wart to find that a fuse had, in fact, blown. Deciding that a variable power supply was required, I built a simple one from a triac dimmer switch, the transformer from the busted 18V unit, and a fuse. This AC power supply works like a charm.

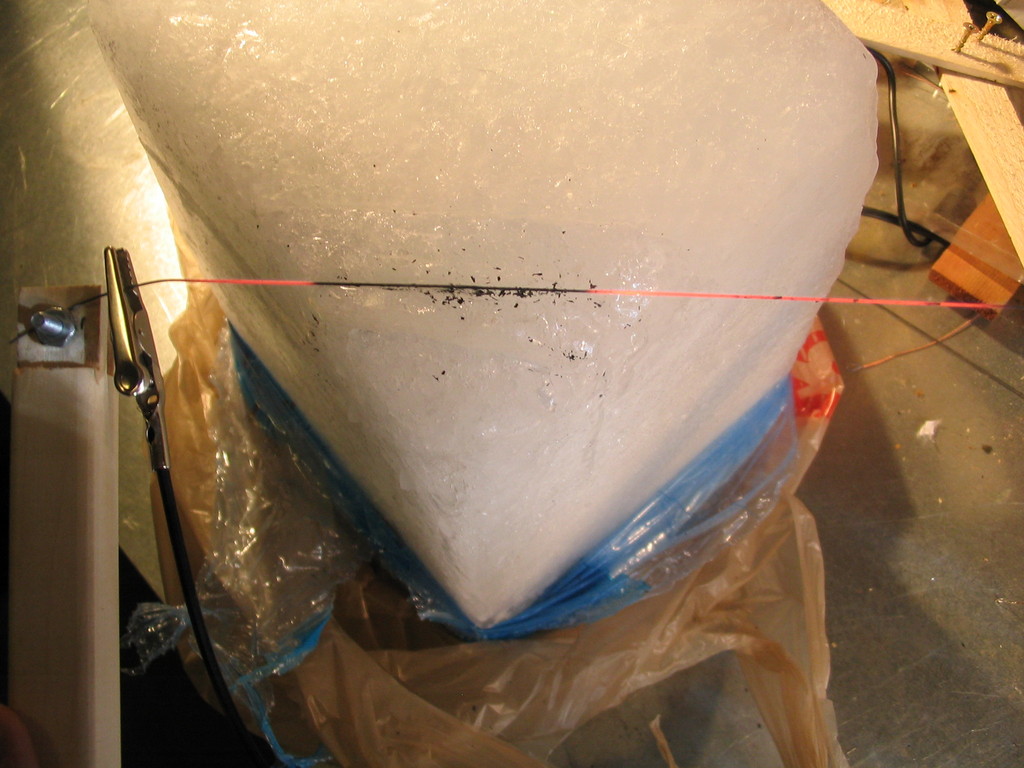
Subsequent experiments with steel wires revealed significant inadequacies. One problem was that flakes of some dark material (I assume an iron oxide) sputtered off, deteriorating the wires. Another problem was that the cool parts of the wire in contact with ice didn't heat back up enough to cut at a reasonable speed. Steel's relatively high temperature coefficient of resistance prevented the cold parts of the wire from producing very much heat. Fortunately, the nichrome wire performed better, and it didn't break unless I turned up the power supply higher than necessary.
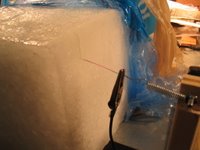
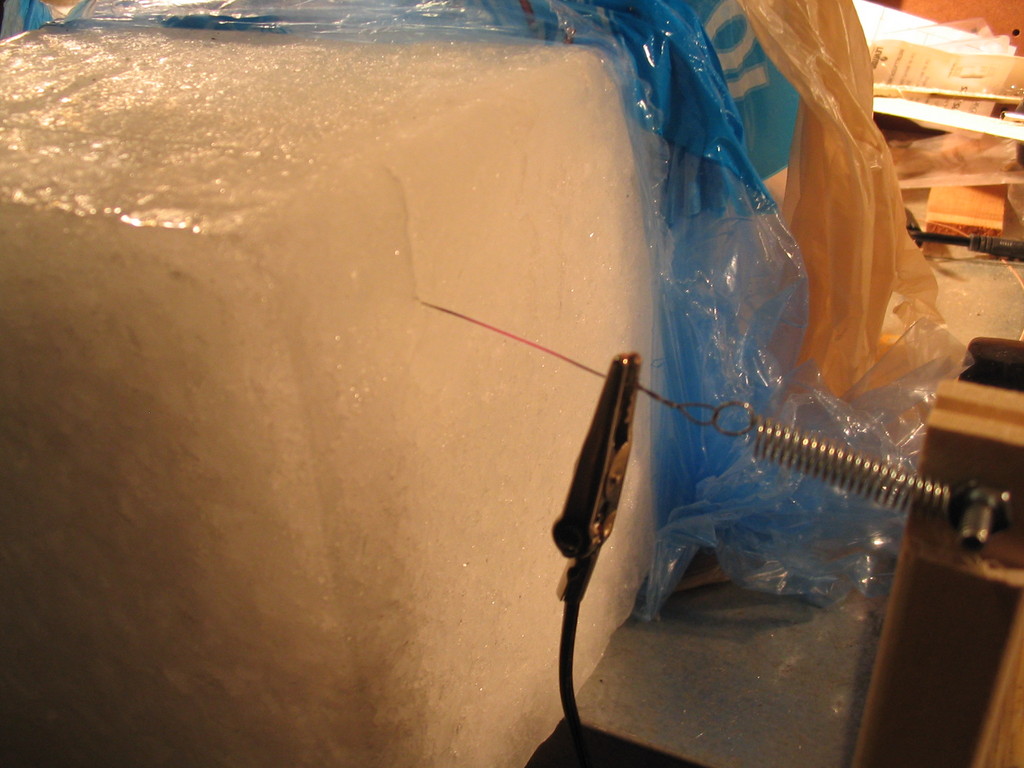
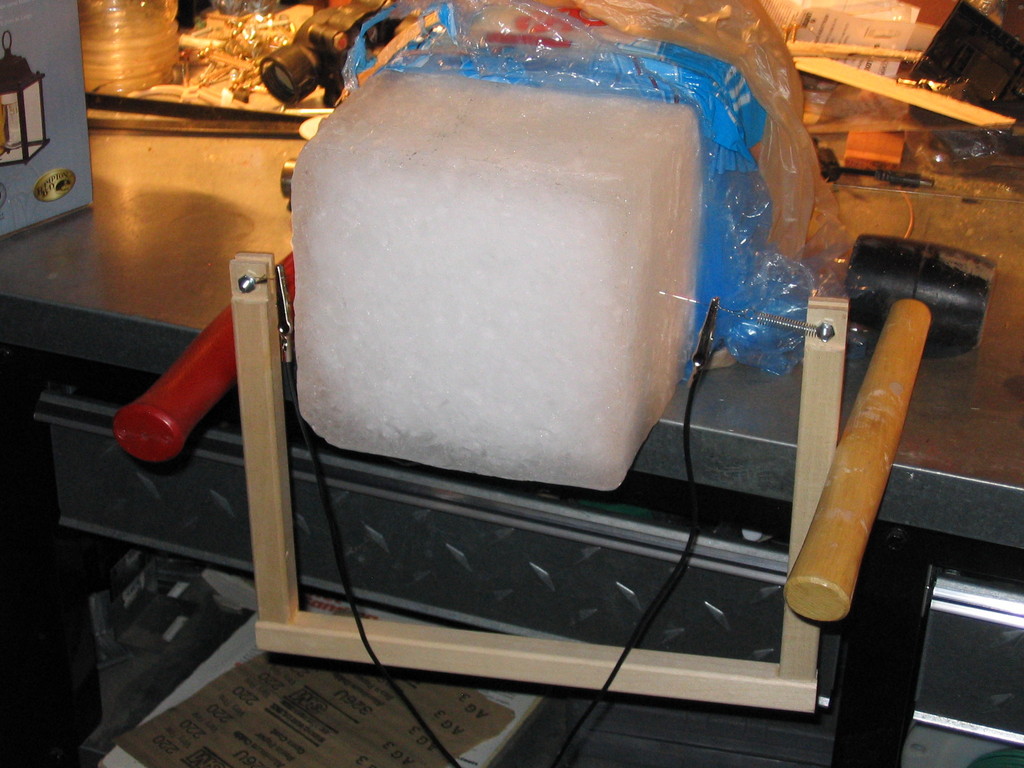
With a little downward force provided by gravity, the nichrome cutter was able to slowly but easily slice through a 10 pound block of supermarket ice (about 6.5" thick). I didn't time it properly, but I think it took about a minute to penetrate the entire thickness of the ice block. A very small amount of refreezing took place in a couple spots, just enough to keep the slab from falling to the floor.
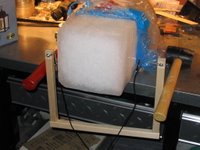
I was able to remove the slab cleanly with a whack from a rubber mallet. Hitting the ice with a mallet wouldn't be a good idea at very cold temperatures, but the refrozen bits could probably be broken safely with a stronger, cold wire. Maybe refreezing could be completely avoided by using a hotter or thicker hot wire or by passing something (teflon strip? cold wire? another hot wire?) directly behind the hot wire.
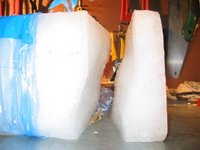
Gravity turned out to be a poor guide. If we were to use this technique for slab cutting, I guess we would need rails to guide the wire terminals.
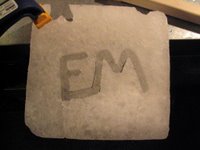
Using the nichrome cutter, I carved a freehand trifle for Emily out of the small slab. Due to small inconsistencies in the perpendicularity of the cuts, I wasn't able to completely remove the carved piece from the slab without breaking something. For this kind of work, a stationary wire design would be better. I'll have to experiment with increased wire tension.

Hot wire cutting is clearly a valuable ice carving technique. While certainly not supplanting the chainsaw or die grinder, the hot wire is able to make precise cuts not possible with the more traditional tools. Although my first design was a hand-held tool for freehand cutting, I think that a stationary, vertical wire would be more useful for detail work. I also think that a slab cutter employing a long wire could be practical.

I'm still concerned about:

  • electrical safety: longer wires require higher voltage
  • cutting speed: it is very slow, although slab cutting doesn't need to be fast
  • refreezing: after cutting the supermarket block, I'm feeling more confident about this one
  • wire breakage: I'd like to try thicker nichrome and possibly other materials
  • ice cracking: we'll have to test this at cold temperatures

Thursday, November 16, 2006

music box

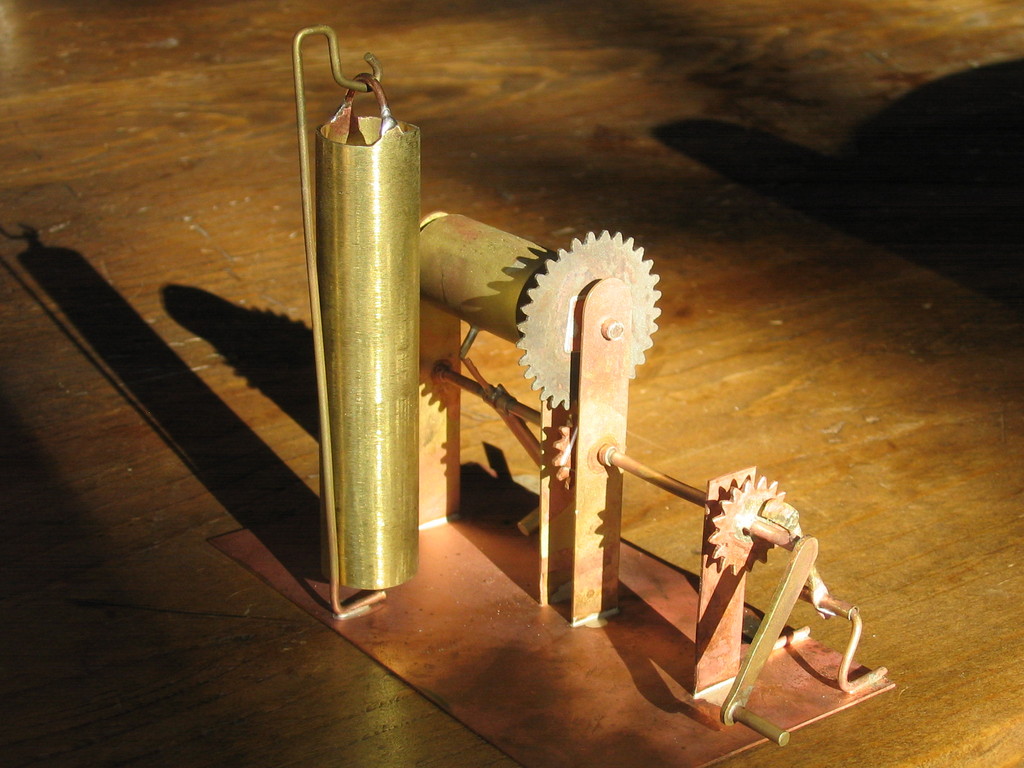
The model Lars sent arrived on Monday, and it is fantastic. He proposes to build a working music box out of ice for the Single Block Classic at Ice Art 2007. The model is finely constructed and works flawlessly. A ratchet prevents the crank from being turned the wrong way. The crank turns a cylinder by way of two gears. A pin on the cylinder lifts and drops a hammer that strikes the bottom edge of a vertical chime.

The model only plays one note, but it will be simple to add a small number of additional chimes. We'll make solid, rectangular ice chimes as, like Lars, I have no desire to make giant, hollow cylinders out of ice.

One question remains: What tune shall it play?

Tuesday, November 14, 2006

this is a drill and you will be receiving candy

Today at work, one of our hospitals performed a surprise anthrax exposure drill. I saw a flier entitled "this is a drill and you will be receiving candy" that explained the event. Two thousand bags of candy were distributed in lieu of antibiotics. While I personally feel that anthrax is one of the less likely agents of destruction that could affect our facility, it is certainly good for hospitals to prepare for all sorts of health disasters, and the use of candy was a great way to encourage participation.

ovation awards

Congratulations to my big brother, David O, for winning the Ovation Award for Sound Design for his work on Ubu Roi. He was also nominated for his Music Direction of The Wild Party.

blog blog

I've decided to try blogging about more than just mechanical ice sculpture. Does anyone care? Probably not. But, hey, blogging is more fun than watching television. Anyway, if you want to just read about the ice stuff, click on ice in the Topics sidebar.

documentaries

We enjoyed taking part in Sandra Skibsted's documentary production at Ice Art 2006. The last I heard, Sandra was shopping screeners around to various broadcasters in the UK and was in the process of hiring an editor. Hopefully we'll get to see it before long, although I wouldn't be at all surprised if Lars and I end up on the cutting room floor.

Not so with next year's film! My friend, Dan Gottesman, has decided to create a documentary about Lars's and my adventures in mechanical ice sculpture and our quest to build a working ice clock. He is teaming up with Brian Kallies, video producer, and Tamara Kubacki, folklorist, for the endeavor. They hope to make the trip to Fairbanks for Ice Art 2007 and 2008. Crazy.

Dan, Brian, and I played together in a fun band, Flocos, in Chicago several years ago. It's been a long while since Flocos fizzled, but we still can't bear to take down the web site.

error analysis: drill bits

The spade bits I made for the 2006 event just didn't hold up. The steel blades rotated out of position and bent, and the nuts and bolts broke, bent, or simply came unscrewed. They worked briefly but couldn't withstand sustained use. I should have:

  • used thicker steel,
  • ground the cutting edge symmetrically, and
  • welded instead of using nuts and bolts.

Lars says he'll try to do just that and make us a nice set of giant spade bits for the 2007 event. With a 3/8" shaft, I think they'll hold up well and will hopefully last for many years.

Another option would be to use commercially available forstner bits, but a set of very large ones would be quite expensive. We prefer to make whatever we can and save our money for the things (giant chainsaws!) that are hard to make.

Sunday, November 12, 2006

masquerade

Lars took a break from building a "walk off" runway at Belfair for the upcoming Zoolander-themed masquerade. We talked on the phone for the first time in months and compared notes in preparation for Ice Art 2007. He is sending a model of his design, and it should arrive tomorrow.

hot wire ice cutting

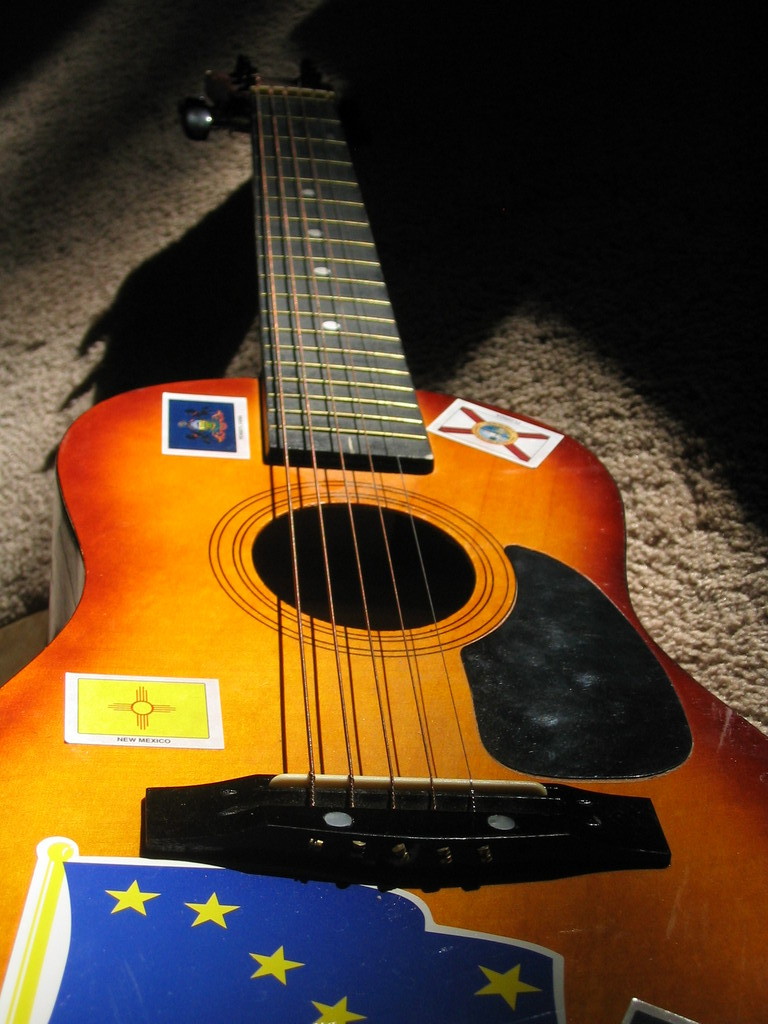
The high E string on my little guitar was sacrificed Wednesday night for my first attempt at hot wire ice cutting. The strings needed changing anyway as they have miraculously survived more than 2.5 years of frequent travel without a case. With an old cell phone charger (5.7V, 800mA) as a power source, the wire warmed up enough (maybe 150°F) to easily cut through foam peanuts, but it did nothing to a block of ice.

More electrons were required, so I dug around until I found a bigger power supply (18V, 1111mA) from an old DSL modem. With that much juice, the wire became red hot in less than a second! I gently cut through the corner of a 10 pound ice block and noticed that the wire went dark where it came in contact with the ice. After penetrating about an inch, the wire broke. It seems that it became extremely fragile at the edge of the ice where there was a high temperature differential. After it broke, I noticed that the ice had re-frozen behind the wire, leaving the wire trapped within the ice.

Encouraged, I glanced around for some sturdier wire and decided to try some 1/16" picture hanging wire. This turned out to be a poor choice as I stupidly failed to measure the wire's resistance prior to hooking up the power supply. It didn't heat up at all, and the power supply completely stopped working. Oops. I then discovered that the wire had no measurable resistance, so I had probably blown a non-serviceable fuse in the power supply by creating a short circuit.

At the office the next day, I happened upon Noel throwing out a 15V 1.2A power supply with a damaged DC cable. Perfect! I also picked up some nichrome wire and a couple sizes of steel wire at a hobby store. Hopefully I'll be able to come up with an effective but less fragile combination of power and wire.

Saturday, November 04, 2006

error analysis: blogging

I think I did a fair job as a first time blogger capturing the events of the week, but I certainly could have done better. I didn't blog or even photograph a whole bunch of things that I could have:

  • chainsaw modifications
  • ice chime experiments
  • Sandra, Patty, and Annie's documentary production
  • competitors and their tools and techniques
  • fans who visited us repeatedly
  • the lathe in action
  • the gear tooth cutter in action
  • the sub-zero natural ice lubricant showdown
  • Wednesday night's pizza box design session at Belfair
  • observations on day one of the multi-block

My process for posting photographs was way too slow. I had to take the camera back to Belfair (we were only there for a short time each night), transfer the images to my laptop, select good ones, edit them with the GIMP, copy them to a flash drive, take the flash drive to Ice Park, and upload them to the blog at a convenient time at the warming hut. All of this activity created about an eighteen hour delay. I should have used ImageMagick or some such thing instead of the GIMP; since 90% of the image edits were just resizing and occasional rotation, batch processing from the command line would have saved time. The greatest benefit would have come from being able to upload photos directly from the camera to the blog on the warming hut computers, but my need to edit the images prevented me from doing so. (Also, I never tested connecting my camera to a warming hut PC; it might require special software or a separate CompactFlash interface.) I could probably download Windows binaries of ImageMagick or maybe even use a Linux LiveCD. Another option might be to use Flickr or a similar service.

it's been too long

Yikes! It's been over seven months since my last post. I guess we've been up to other things, but the return of cold weather is making us think of ice once again. Lars tells me he has a working model of a possible design for Ice Art 2007. I can't wait to see it!

Tuesday, March 21, 2006

error analysis: drill press

Our design required quite a few large, precise holes to be bored through pieces of ice. Some of the holes were to accommodate freely turning axles, some were to be bonded to axles, but all needed to be perfectly perpendicular. The best way to bore perpendicular holes is with a drill press, but many of the holes, such as those in the middle of large gears, required a drill press with an incredibly deep throat. Thus was Lars's mobile drill press idea born.

He removed his drill press from its stock pedestal and mounted it on a custom carriage assembly above a steel table. This allowed us to position the drill over any part of a large slab of ice. While the concept was brilliant, the hurried construction resulted in critical failures that impaired our ability to bore truly perpendicular holes.

First, a weld broke on one side of the carriage, most likely because of the quality of the scrap steel it had been made from. The drill press could still be positioned and operated, but the drill pulled away from the carriage every time the bit was pressed into the ice.

Second, the carriage rails rested on top of vertical pins at the edges of the table but were not firmly attached to the pins. Even when holding the broken weld together, this allowed the entire carriage assembly to come out of alignment under pressure.

Third, even if we had solved the first two problems, there was no easy way to set up the carriage such that perpendicularity of the drill bit with respect to the table could be assured. We would have had to first level the table (not a simple task on hard packed snow) and then carefully adjust all four pins to level the bit. If we had ever changed the height of the rails, we would have had to readjust all of the pins.

The mobile drill press also had trouble with vertical travel. We weren't able to drill deep enough below the carriage rails, but we probably could have corrected this by shortening the pipe supporting the drill and/or using bit extensions. The total travel of the drill press was about three inches, but a few of the parts to be drilled were four or six inches thick. We figured that we could flip parts over and drill them from both sides, but we hadn't prepared any kind of centering jig to ensure correct alignment of opposing holes.

All in all, the mobile drill press turned out not to provide any benefit over a hand drill, but the original idea still has great potential. With several months to come up with a better solution, I'm sure that next year's model will be much improved.

Monday, March 20, 2006

ice garden

Sharon and Lars have completed a delightful Ice Garden in the Fairbanks Open Exhibition. I'm especially impressed by the sunflower. Wow!

After Lars returned from his extended job on the Kamchatka Peninsula less than two weeks before the Single Block Classic, he immediately enrolled in an ice carving class. Sharon joined him for the class because it was the only way she could spend time with him during his frantic preparations. It's great to see that they've put their new skills to good use.

Monday, March 13, 2006

error analysis: weather

We knew the ice would be brittle at cold temperatures, but we didn't expect the problem to be so severe. The weather during the competition (9:00 AM Tuesday to 9:00 PM Thursday) was unusually cold. Normal high temperatures in Fairbanks in early March are 15°F or so, but, out of three days, only Thursday had a high temperature above 0°F. Working the ice that day seemed incredibly easy after our experiences the previous two days.

At 20°F, carving ice with appropriate tools is like carving a block of cheese; at -20°F, it is more like carving glass. Miniscule impacts can result in huge fissures, and contact with liquid water yields a lattice of tiny surface fractures at best, more often causing substantial cracks. If you have ever heard ice cubes crack after being dropped into a beverage, you can imagine the effect on a larger scale. We learned a fun trick: Take a fair sized (fifty pounds or more) slab of ice at -30°F and toss a bucket of warm water over it. Spectacular shattering! Unfortunately the effect meant that we were completely unable to use waterglue at the extreme temperatures. Even around 0°F we had to be very careful, making sure the water was no warmer than 32°F and spreading it thinly.

Cold temperatures are hard on tools as well. Gasoline powered chainsaws are particularly difficult to operate, but we were able to minimize the problem by constructing a small warming tent for our tools out of a blanket, a steel chest, and a small space heater.

To a certain extent, we can chalk up our temperature troubles to bad luck, but there are a few things we could do to better handle the situation. Now that we've learned which tasks can't be accomplished at extremely cold temperatures, we can plan those tasks for the warmest times of day. We can also maximize the amount of daylight work hours. Spending the entire day of Tuesday in the shop eliminated a full third of our (relatively) warm temperature hours.

We've also talked about trying a larger scale warming tent, possibly encompassing some of the pieces of ice to be worked or even ourselves. Taking the idea to the extreme, we might try warming the entire 7600 pound block of ice or even constructing a tent around the whole work site. These efforts would certainly be overkill in normal temperatures but might be worth consideration in a bad cold snap.

next year

We learned a tremendous amount at this year's competition, but perhaps the most important lesson was this: it can be done. We had problems, mostly with tools and weather, that prevented us from reaching our goal of building a working clock out of ice, but we gained confidence in the medium. Counting our successes, we were able to

  • make working gears,
  • make working axles,
  • bore large holes,
  • lay a level pedestal,
  • waterglue a rigid frame, and
  • finish the competition not in last place.

With better tools and more time, I'm certain that we could have completed a ticking clock. As it turns out, we could have taken more time. We didn't know until the end of the event that it is not uncommon for teams to continue working on unfinished sculptures for a few days after the judging takes place. Unfortunately, we were incredibly exhausted after three days and two nights of hard work. We needed rest and already had plans for the weekend, so we decided to pack everything up and go home.

Another lesson: this is fun! Okay, that wasn't exactly unexpected, but the entire ordeal was a challenge we will never forget. Carving ice is fun, and the quality of ice, support from volunteers, talent of the competitors, and overall atmosphere of the World Ice Art Championships made the whole experience absolutely incredible. If they'll have us back, we would like to return next year and for many years to come.

We probably won't try to achieve our goal of a working clock next year, but perhaps the ice clock will become a reality in 2008. We have plenty of time to decide what to do in 2007, but right now we're thinking of trying something a bit less challenging that will allow us to improve our tools and skills before attempting the ultimate goal. Whatever we create, it will almost certainly be mechanical and/or interactive.

Tuesday, March 07, 2006

competition results

We attended the awards ceremony at the outdoor ice stage Friday night and were happy to see many outstanding artists win awards. In particular, I was glad that my favorite sculpture won the artists' choice award. After the event, we picked up our results and were pleased to discover that we placed 25th out of 29 teams in the realistic category. With as many problems as we had, I think it was a pretty good result for our first effort.
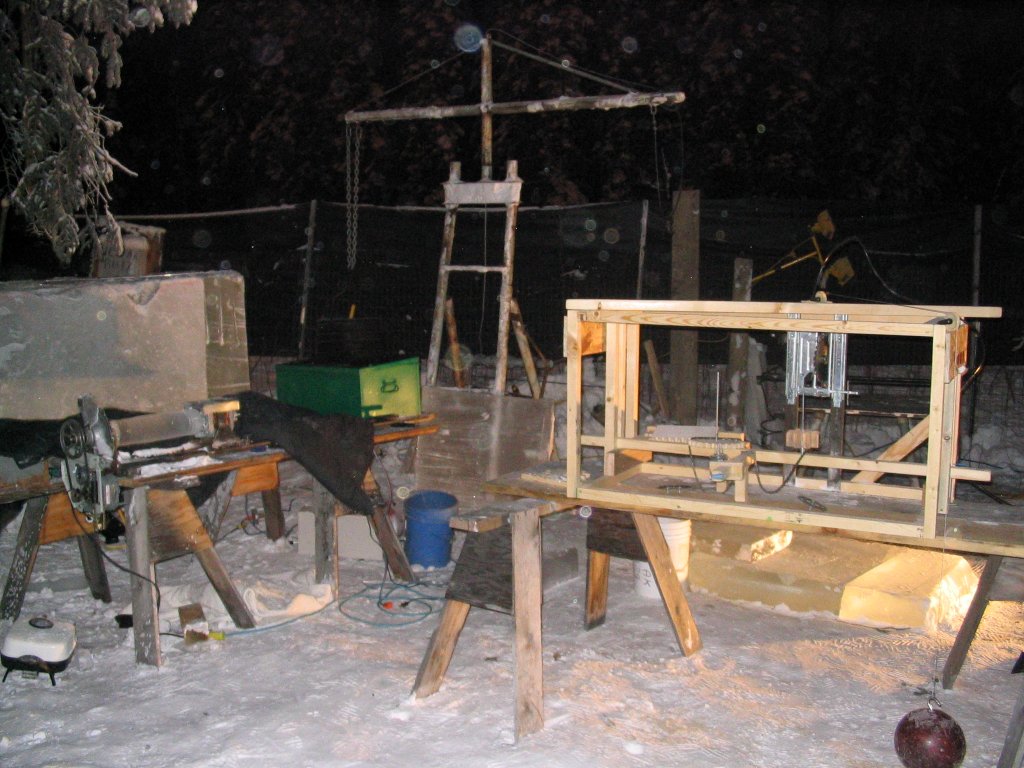
The sculptures had all been lighted by colored lights on Friday. These will remain in place until Ice Art closes for the year.

Friday, March 03, 2006

finished

During the final minute before the horn sounded at 9:00, we brushed snow off of the sculpture and used a blow torch to make the clock face transparent enough to allow visibility of the interior gear teeth. We took a step back and noticed that the entire piece, with the exception of the pedestal and the little gear perched on top, was made on Thursday. Most of it had been assembled during the eleventh hour (actually the fifty-ninth hour).

The sculpture is over six feet tall but used very little of our original ice block. The gears engage and turned a little, but an alignment problem caused by poor drilling made it apparent that continuous turning would result in disaster.

Our idea for this alternative design was to create an interactive sculpture that allows people to use the crank to turn the hour hand on the clock, but we decided to waterglue the parts together to prevent rotation and subsequent breakage.

Quite a few sculptors dropped by during clean-up to congratulate us and express dismay at the removal of all of our insane equipment. One said that he already had some people willing to pool a few dollars a day each to pay us to stay and keep using our tools! Although the offer was tempting, total exhaustion convinced us to continue loading the truck and head back to Belfair for ice cream, Atari, and a long night's slumber.

the final day

The weather improved considerably on Thursday. Temperatures near 0°F allowed us to use waterglue to bond parts together and attach templates for gear tooth cutting without cracking the ice. Lars did a lot of chainsaw and lathe work, and I made gears. More and more people, including other sculptors, stopped to talk to us as the final hour of the competition drew near.

We encountered a number of drilling problems. The custom spade bits didn't hold up under extended usage; screw heads broke off, steel bent, and nuts came unscrewed, but we managed to get through everything that absolutely had to be drilled. Since the broken drill press carriage assembly wasn't able to make perpendicular holes, we had to use the hand drill, and hand drilling with failing bits resulted in some poorly aligned holes.

The gear tooth cutter had trouble as well. The first set of problems turned out to be caused primarily by poor drilling of spindle holes through the gear blanks, but a second set of problems resulted from the fact that the machine just wasn't well suited to cutting gear blanks weighing more than 50 pounds. I ended up using a manual method of positioning the gear blank for cuts but still taking advantage of the ability to spin the gear on the machine's spindle. This method worked incredibly well; had we turned to it sooner, we would have been able to make gears at a faster pace than was originally anticipated.

Thursday, March 02, 2006

the official page

http://www.icealaska.com/06/06sb/06sbdaily/06sb16.html

This is the Ice Alaska page for our project.

the clock is ticking, but not ours

With the sun approaching the horizon on Wednesday, we came to the conclusion that we would not be able to complete the clock by the end of the competition Thursday night. Between our incomplete or missing tools, the extreme cold temperatures, and our lack of experience, the challenges were too great. Warmer weather during daylight was helpful, but too many tasks were left that could not be done at night without cracking the ice.

While other sites featured enormous, beautiful ice sculptures and a few tools, our site featured strange and enormous tools but no obvious sculpture. After we made the decision to abandon the original plan, we became more carefree and had as much time as we wanted to talk to spectators. It turns out that there are a lot of people who just love to look at and talk about the tools! I had always questioned the artistic merit of the clock in the back of my mind, but now I've realized that our project is a performance piece more than it is a sculpture. With this in mind, we reorganized our site with the gear tooth cutter and lathe front and center. People love seeing the things in action and learning how they work.

We haven't completely given up on the clock, but we are stopping work on this attempt. Instead we will focus on our performance, enjoy the moment, and build something out of ice. We don't know what it will look like, but it will have gears and will move.

Wednesday, March 01, 2006

Fairbanks sunrise

Compared to last night, -4°F and sunshine are incredibly invigorating. We got a good start this morning, but we've run into problems this afternoon. It is too difficult to align slab cuts from opposite sides of the block, so Lars is off looking for a bigger chainsaw bar. We found that a belt sander works very well on ice. We thought it would alleviate our slab cutting difficulties, but the sander started having trouble. A weld broke on the drill press carriage, a design flaw is preventing the gear tooth cutter from making the smallest gears correctly (although we can fudge the process pretty well), and some parts forgotten at Belfair are preventing us from making any gears other than the smallest.

It is supposed to be cold again tonight, but not quite as cold as last night. The high tomorrow is predicted to be 10°F.

first night

When we finally headed back to Ice Park, it was getting late at night. The sign at UAF said it was -28°, much colder than we had hoped. By the time we were on our way back to Belfair a few hours later, the temperature had dropped further to -38°F! Don't you hate it when your eyelashes freeze together every time you blink?

We arrived at the site to find that our neighbors had made amazing progress. This is what their sculpture looked like when we were just getting started cutting our block.

While I worked on making gears, Lars was able to cut some slabs with the chainsaw, using the hoist to move the bigger pieces. While setting up the hoist, we needed a small weight to take up slack in the cable, so we grabbed the bowling ball with its convenient hook. As Lars was testing the range of the hoist to see if it would reach the ice block, he barely tapped the ball against the block. The gentle bump caused a huge crack to zip through the block! We knew that ice gets brittle at extremely cold temperatures, but, wow, we were surprised by just how fragile it is. I guess my wrecking ball idea was prophetic. Not only does the ice break easily, but it can't be glued back together with water like it can at warmer temperatures. Lars had the good sense to try dripping a little water on a discarded piece of ice, and it shattered instantly.

By the time we left to get a little sleep, our sculpture consisted of a single slab (actually three separate pieces set like flagstones) on the ground. It isn't pretty, but it is strong, smooth, and level. This will be the pedestal upon which the ice clock will be constructed.

Due to the cold, we decided not to cut any more of the block for fear of making even more horrifying cracks. Hopefully it will be warm enough in the daylight to proceed safely.

at the shop

Back at the shop, much was accomplished. I finished a set of custom spade bits for the drill press, and Lars worked on his slab cutting bandsaw. It took several hours, but I finally finished the gear tooth cutter. The only pieces remaining to be done are a couple of differently sized guide rack and pinions, but those can be made at the site.

I was looking around for a counter-weight for the gear tooth cutter, and Lars had the brilliant idea of using a bowling ball he had in a junk pile somewhere (no, those of you who know Lars, it is not that bowling ball). I attached a big hook to it and hung it on the cable; It worked great! Hanging from the cable, it reminded me of a wrecking ball, so I suggested that we could use it as such, suspended by our hoist, in the event that we declare the project a total failure.

Alas, we had to give up on the bandsaw. The devices presented multiple unsolved challenges, but death was not pronounced until the motor started to smoke. It just didn't have enough power, or maybe it did have enough power but ran the blade too fast. We threw it into a snow bank where it will remain for several days at least. I am confident, however, that it will one day rise again, better, stronger, slower.

Instead of the bandsaw, we modified a (borrowed!) 20 inch bar chainsaw with a custom shoe plate for guiding perpendicular cuts. This will have to do for slab cutting, although it requires cutting from both sides and hoping for good alignment.

back to Belfair

We weren't able to accomplish much this morning because our custom tools were not complete. It was a good thing we were able to be on site in order to get our block re-positioned, but we didn't get anything else done apart from dropping off equipment and leveling the dirt upon which the clock with be erected. So, it's back to Lars's shop at Belfair to finish our tools. We are allowed to work at Ice Art around the clock until 9:00 PM on Thursday, so we should still have plenty of time once the tools are done.

Steve wasn't kidding about the roads being like skating rinks. On top of the sheets of ice, Fairbanks received over a foot of fresh snow just before my arrival. It was the highest single snowfall in years.

heavy lifting

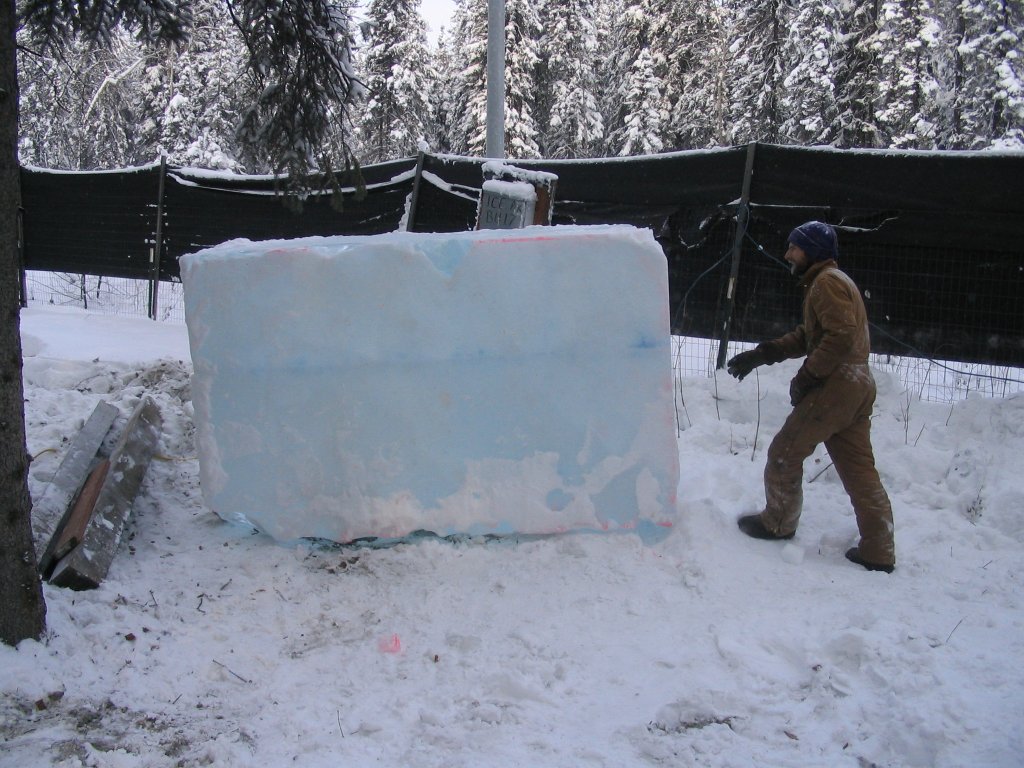
Our block is 93 inches by 59 inches by 42 inches which means that the zoom boom had to lift about 7660 pounds. Our site (now #16 after a re-numbering that took place today) is surrounded by trees, so Connie, the driver, wasn't able to lay the block down on our timbers like we wanted. She did, however, deftly remove the block from our site, tip it on its side, and re-deliver it in a pretty good spot for us.

Most of the teams want their block placed in a particular way so that it can be sculpted in a good viewing position, but we chose to place ours in the back corner of our site. We are going to carve slabs off of the block, cut parts out of them, machine them, and assemble the clock at the other side of the site.

waiting

The chainsaw didn't want to start, so Lars warmed it up with a hair dryer while we were waiting for our block to be "tweaked" to our desired position.

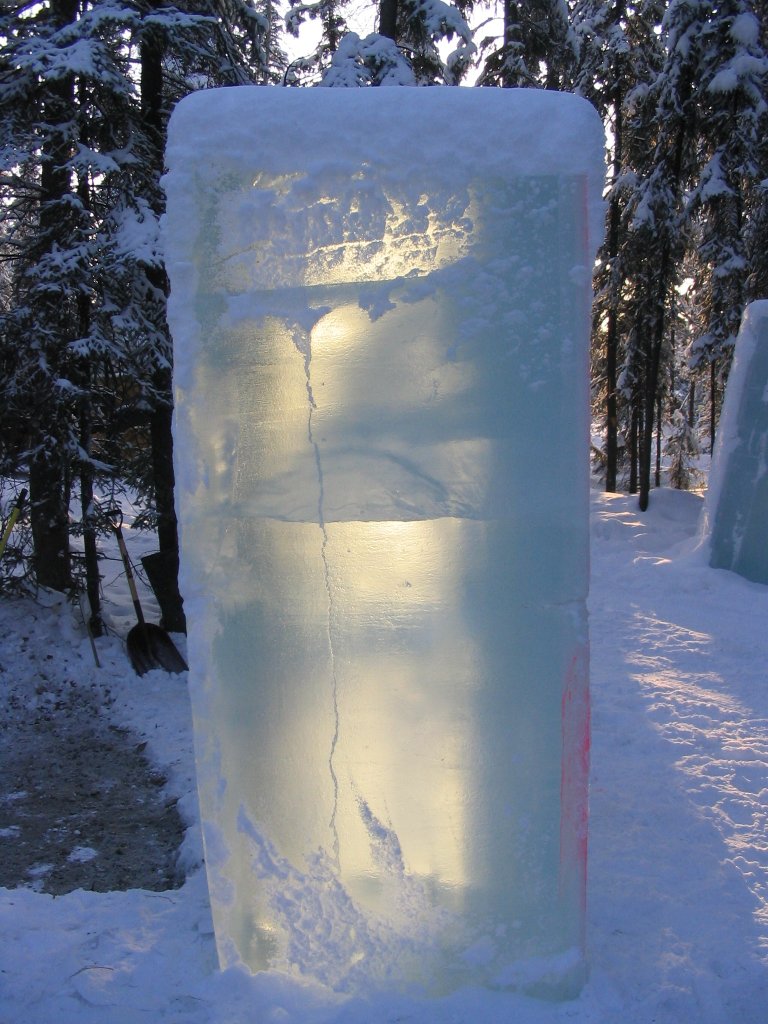
The sun rose and revealed the depth of the cracks in our block. There are some major cracks, but the good news is that the overall quality of the ice is superb. With any other ice we've ever seen, we wouldn't have a chance at being able to see how deep the cracks go.